Page 1 of 4
Irish's CBH CR200
Posted: Mon Dec 31, 2012 4:21 am
by IRISH
I started (again) on the new chop this past week. I got the seat post x-member and seat post fish-mouthed and cut, and also mitered the rear wishbones. I'm using the blueprint from the CBH for the CR-200 (Custom Rigid) with wide rear wheel. I'm using a 1.5" backbone instead of the 1.25". I also want to use a single down tube instead of the double tubes running up from the front motor mount. I'll bring the lower rails together just above the front mount and run another 1.5" tube up to the head tube.
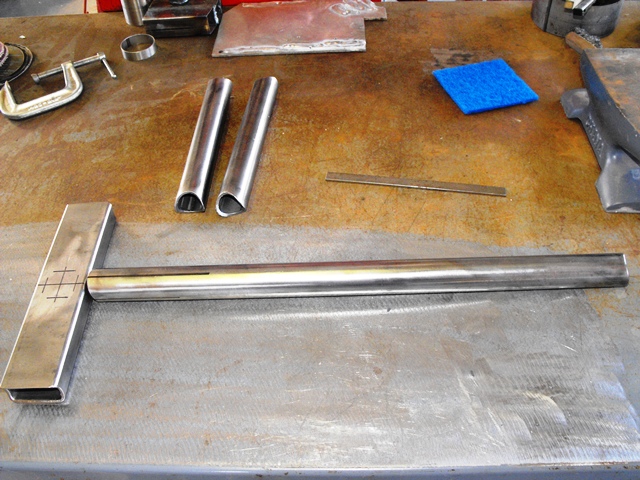
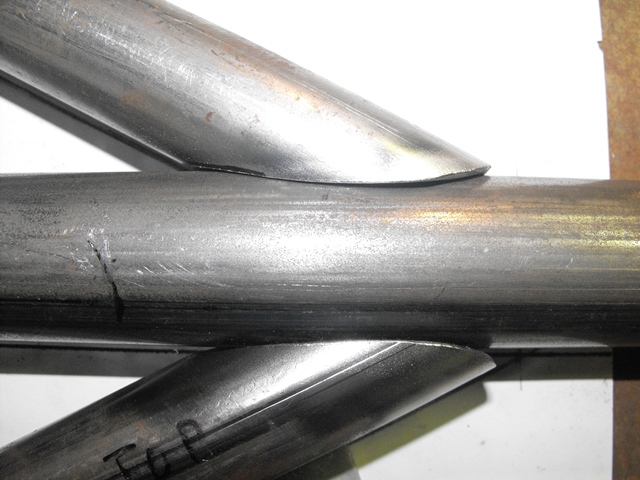
- seat post cross member and seat post mitered and cut to length ready to tack
- DSCF0003.JPG (173.24 KiB) Viewed 8893 times
- DSCF0001.JPG (181.54 KiB) Viewed 8893 times

- DSCF0002.JPG (141.13 KiB) Viewed 8893 times
I scored a vintage Randy Enterprises springer fork that is quite long, 34.5" from the lower tree to the rear rocker pivot, so I want to stretch the backbone and down tubes more than what the plan calls for; how much more I don't know yet. I need to get the rear wheel and tire bolted up and then I can mock up the front and get the look I want. I ordered a 18x5.5 rear wheel for the project and I will mount a 180 or 200 tire. I will probably run a chain final drive to keep it narrow.
The springer came with a 18 inch Hallcraft's front wheel and mini drum which I'm selling on ebay. I'll use a 21 inch narrow glide disc brake wheel up front so the bike will stop. I need to shape up the rockers, or build new ones as the original Randy's are a goofy shape (70's). I also need to find a 1"-24tpi die to fix the stem threads as some idiot beat them up for some reason - probably trying to keep the top nut from coming loose I guess.
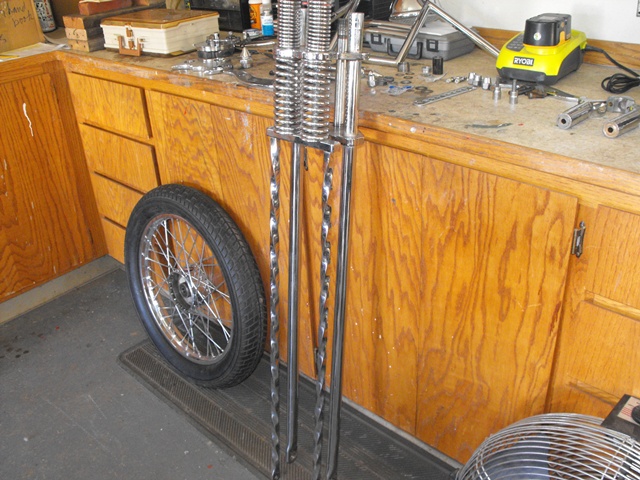
- 14 over Randy Enterprises front end
- DSCF0008.JPG (156.78 KiB) Viewed 8893 times
I used the Tube Miter program.
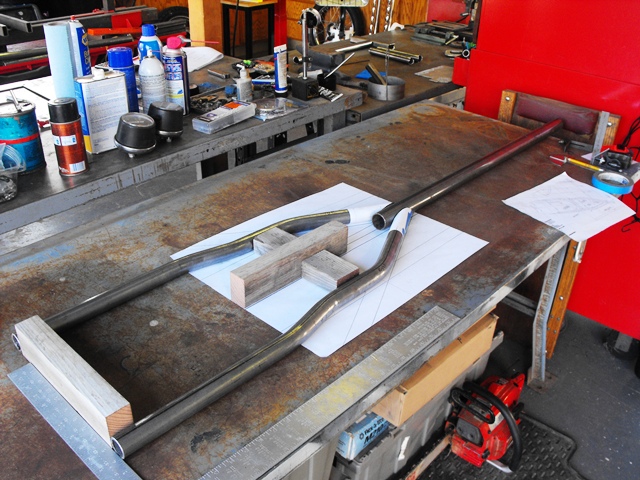
- rear wishbones getting fitted to 1 1/2" backbone
- DSCF0004.JPG (182.3 KiB) Viewed 8893 times
- final fit up is nice and tight
- DSCF0012.JPG (136.25 KiB) Viewed 8893 times
Re: Irish's CBH CR200
Posted: Tue Jan 01, 2013 1:54 am
by Jeff L
The joints look nice.What program did you use.Forget which one I had, but my computer crashed before I got a chance to use it.
Re: Irish's CBH CR200
Posted: Tue Jan 01, 2013 5:14 pm
by IRISH
Tube Miter by Giles Puckett:
http://www.ozhpv.org.au/resources/shed/tubemiter.html
It's the same one I used on the first one. You have to convert to mm. Works really nice.
Re: Irish's CBH CR200
Posted: Wed Jan 02, 2013 1:40 am
by Maxthegardener
Nice Start!

Re: Irish's CBH CR200
Posted: Wed Jan 02, 2013 3:59 am
by IRISH
Thanks Jeff and Max.
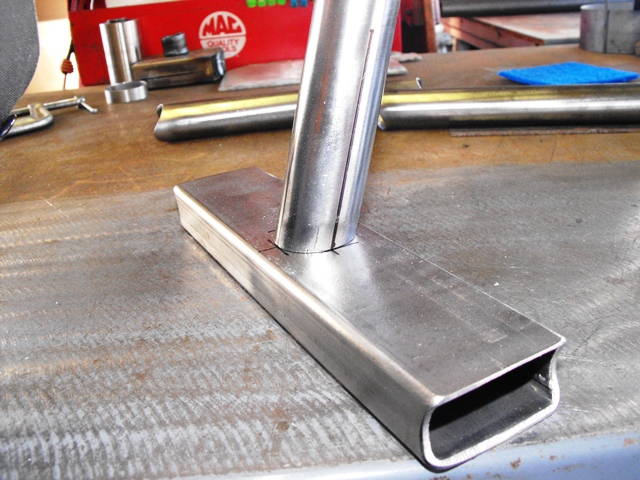
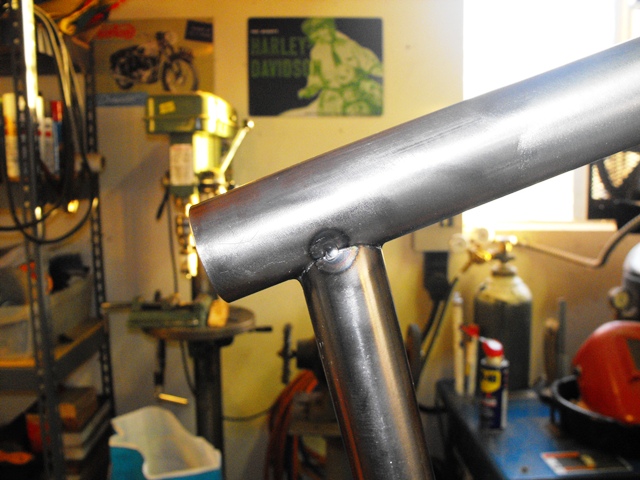
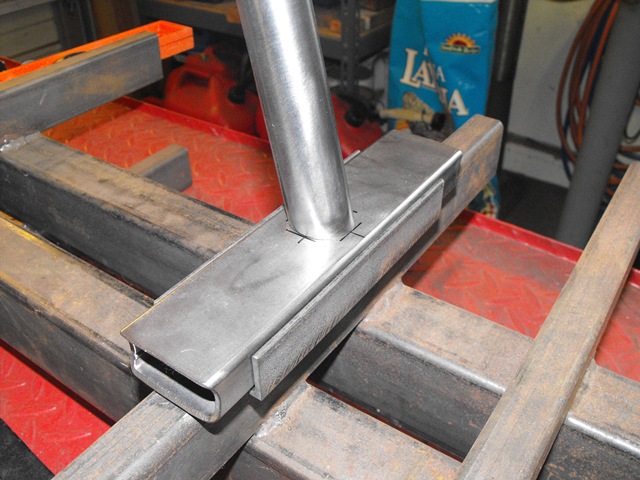
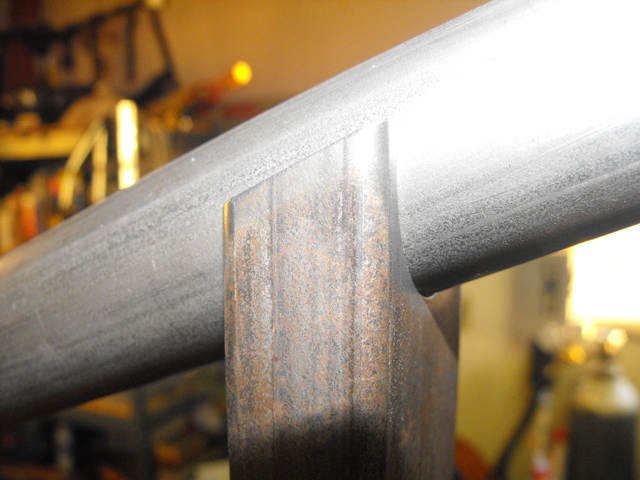
Day 2: I tacked the top tube to the seat post. Then I welded two lengths of 1" angle to the cross bar on the jig to hold the seat post cross member in place. I then wanted a support for the top tube so I set up a length of 1x2 rectangular tube at 25 degrees from horizontal and used a 1.5" hole saw. I then sawed through the center of the hole. I will weld tabs to each side of the pieces and drill and tap them to make a clamp to hold the top tube in place.
- 1-1-13-1.jpg (134.52 KiB) Viewed 8861 times
- 1-1-13-2.jpg (112.74 KiB) Viewed 8861 times
- 1-1-13-3.jpg (135.23 KiB) Viewed 8861 times

- 1-1-13-4.jpg (179.36 KiB) Viewed 8861 times
As I mentioned earlier I am build the jig as I build the frame so I can reproduce this frame over and over in the future. I am going to make the head tube fixture adjustable so that the rake and height of the head (steering) tube can be changed for different degrees of rake and position. That's next.
Re: Irish's CBH CR200
Posted: Wed Jan 02, 2013 10:46 am
by budoka
ok, ok, you are having waaaaaaaay too much fun. can i come over and play?
i've gotta get done with this moving crap so i can get on with putting the knuck back together.
good luck to ya as you progress!
-dan
Re: Irish's CBH CR200
Posted: Wed Jan 02, 2013 12:28 pm
by IRISH
You are welcome anytime Dan! Thanks! It is fun to get back to fitting a frame together. I sold the old front wheel that came with the springer so I'm shopping for a 21 now.
Re: Irish's CBH CR200
Posted: Wed Jan 02, 2013 3:25 pm
by railroad bob
Nice start Craig, and I think making the jig as you go allows you to make decisions and changes
that are hard to foresee without a huge amount of pre-planning. Should save you quite a bit of time.
Good idea...
Re: Irish's CBH CR200
Posted: Sat Jan 05, 2013 7:42 pm
by IRISH
Thanks Bob. It's fun as hell too!
Re: Irish's CBH CR200
Posted: Sat Jan 05, 2013 10:49 pm
by IRISH
Re: Irish's CBH CR200
Posted: Sat Jan 05, 2013 10:51 pm
by IRISH
I also cut and drilled some aluminum plates for the adjustable neck holder. I need to decide whether to use 3/4" round bar or threaded rod for the neck holder. I am thinking of maybe using round bar and boring a 1/4" hole in the end to be used as a pilot hole for a hole saw for cutting the top and bottom tube notches for the neck.

- 1-5-13-1.JPG (132.3 KiB) Viewed 8816 times

- 1-5-13-3.JPG (171.46 KiB) Viewed 8816 times
Re: Irish's CBH CR200
Posted: Sun Jan 06, 2013 8:09 pm
by curt
im always jealous of you guys able to keep your shop that clean while working on a project
Re: Irish's CBH CR200
Posted: Mon Jan 07, 2013 11:56 pm
by Russ
curt wrote:im always jealous of you guys able to keep your shop that clean while working on a project
Same here.
Irish's work shop is cleaner than my kitchen.
Re: Irish's CBH CR200
Posted: Tue Jan 08, 2013 9:37 am
by budoka
now THAT'S what i'm talking about! get off the friggin' couch, tell the reality shows to kiss your ass, and actually live some *reality* yourself. that's exciting. and there's too little of it today. that's why people from way back when are worshipped today...they were too busy *doing* to care what anyone else thought.
keep her coming along, man. we're hanging on the edge of our seats over here, waiting.

-dan
Re: Irish's CBH CR200
Posted: Wed Jan 09, 2013 9:50 am
by Indian Mark
budoka wrote:now THAT'S what i'm talking about! get off the friggin' couch, tell the reality shows to kiss your ass, and actually live some *reality* yourself. that's exciting. and there's too little of it today. that's why people from way back when are worshipped today...they were too busy *doing* to care what anyone else thought.
-dan
Well said! Gotta go, Idol's coming on.