Gary's way of cutting thick trees
Posted: Tue Jan 17, 2012 12:39 pm
This is a thread about how to cut thick steel fork trees with minimal tools and even though it looks crude it can produce incredible results if you spend the time to dress and polish the final pieces. To start out you print the tree pattern on some card stock that your printer can handle. All of my trees are small enough to be printed on regular 8.5x11-inch paper. Cut out the pattern and trace it onto you steel stock.
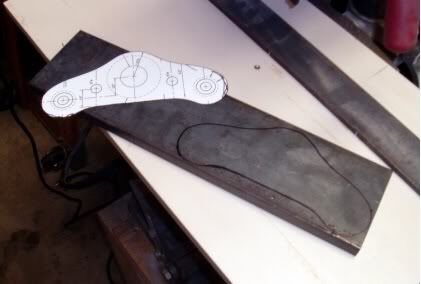
The next step can be done with almost any type of saw including a regular hacksaw but the tool of choice is a reciprocal saw. The key to this operation is in the selection of a blade and most people make the mistake of buying blades that have fine tooth counts like you need for sheet metal work. For thick stock like these 3/4-inch trees you need a short (4" or 6") bi-metal blade with a tooth count of 6, 8, or 10 teeth per inch and the 6 or 8 is preferred. The rule of thumb is to keep 2 teeth in the cut at all times over the cycling action of the saw. Don't use very much pressure. Let the weight of the saw do the work. Don't try to bend the blade and follow any curves. You want to approximate curves by making short straight slices with the saw.

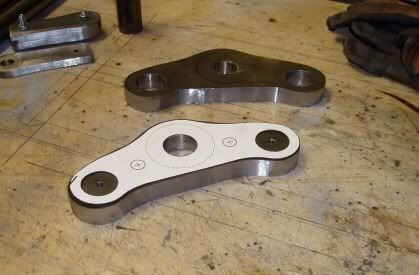
Here's the top and bottom tree cut out. Notice how many small short cuts I made to approximate the curves.
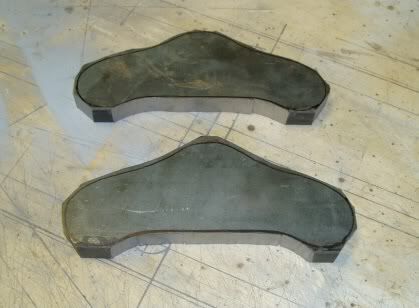
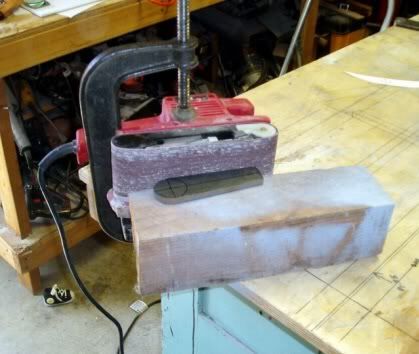
So far this is about $8 worth of hot-rolled steel (try not to use if possible) and close to 30-minutes of cutting with an old dull blade I had. Depending on how much work you want to do with the saw you can keep refining the profile but I usually do most of my shaping with a grinder and/or a belt sander. You don't need a fancy sander and in fact I use the lashup shown in this picture about as much as I use my bench model. I use a 40 grit belt if you can get it but an 80 will also take off a lot of material. I try not to sand down right to the line preferring to do the final sanding/shaping/polishing towards the end of the project.
Next I usually drill the holes, again based upon the pattern I started with originally. You can use hole-saws or drill bits if you have the big ones. The drill press doesn't have to be big or fancy but the table does need to perfectly square with the press quill, and I mean perfectly square otherwise you'll end up with skewed bores.
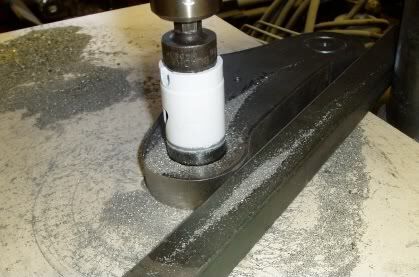
You can shape, sand, polish and otherwise work the parts down to the flea's knee if you are willing to put in some time but keep checking against the pattern so you don't overdo it.
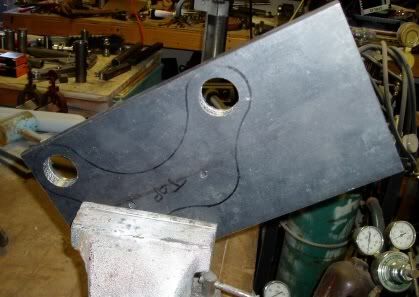
Spring perches are more complicated and larger but since they are only 5/8-inch material they are very easy to cut. You can see here that I drilled the holes while the stock was still 'square' and this is the preferred method. Also note that I've labeled the 'top' sides of the parts. This is because most hot-rolled stock has a better finish on one side than the other. If at all possible do not under any circumstances use hot-rolled as it is pure crap. I only used it on these trees because I had it on hand already.
I add chamfers to the edges of the parts with the 'roller' part of the belt sander and then smooth them flat with a regular palm sander. Here's the perch about half way thru being shaped and finalized. I still haven't sanded the top or bottom surface yet.
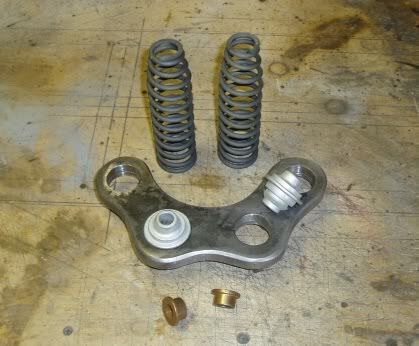
Here's the parts being put together. I generally do the final polishing after assembly so I can smooth down the welds a little bit.
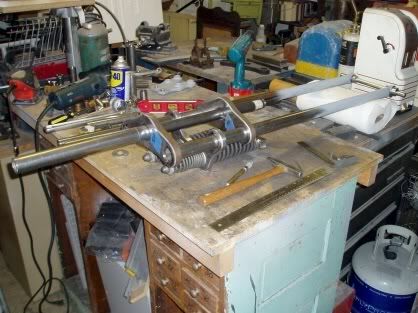
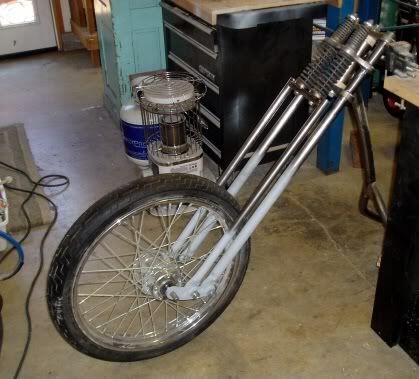
Here are the rough forks on the bike in trial fit. These are not what I would consider to be 'riders' as far as looks go as I didn't spend a lot of time on the pieces since they were needed for a mockup on a tall frame so they are basically a shop tool that I'll be using on some other projects.
From start to finish this was about a 14 hour project but for a nicely finished set of forks it should have taken about 20 to 24 hours.
This method will work relatively easily on steel up to 1-inch thick and then you will begin to notice some kerf to the cuts as the saw blade deflects too much. The secret is not to use pressure, that way the blade stays straight, make many short cuts, not long ones, and let the saw do the work. Don't hurry. Pay attention to the details. This is not at all hard to do and I've actually done it with a handsaw back before I could afford a power saw.
Of course the ultimate way to build these is with a good band saw or a milling machine but it can be done with hand tools if you have the desire. That's the key to almost anything. How much desire you have to create something, not how much money you have.
The next step can be done with almost any type of saw including a regular hacksaw but the tool of choice is a reciprocal saw. The key to this operation is in the selection of a blade and most people make the mistake of buying blades that have fine tooth counts like you need for sheet metal work. For thick stock like these 3/4-inch trees you need a short (4" or 6") bi-metal blade with a tooth count of 6, 8, or 10 teeth per inch and the 6 or 8 is preferred. The rule of thumb is to keep 2 teeth in the cut at all times over the cycling action of the saw. Don't use very much pressure. Let the weight of the saw do the work. Don't try to bend the blade and follow any curves. You want to approximate curves by making short straight slices with the saw.
Here's the top and bottom tree cut out. Notice how many small short cuts I made to approximate the curves.
So far this is about $8 worth of hot-rolled steel (try not to use if possible) and close to 30-minutes of cutting with an old dull blade I had. Depending on how much work you want to do with the saw you can keep refining the profile but I usually do most of my shaping with a grinder and/or a belt sander. You don't need a fancy sander and in fact I use the lashup shown in this picture about as much as I use my bench model. I use a 40 grit belt if you can get it but an 80 will also take off a lot of material. I try not to sand down right to the line preferring to do the final sanding/shaping/polishing towards the end of the project.
Next I usually drill the holes, again based upon the pattern I started with originally. You can use hole-saws or drill bits if you have the big ones. The drill press doesn't have to be big or fancy but the table does need to perfectly square with the press quill, and I mean perfectly square otherwise you'll end up with skewed bores.
You can shape, sand, polish and otherwise work the parts down to the flea's knee if you are willing to put in some time but keep checking against the pattern so you don't overdo it.
Spring perches are more complicated and larger but since they are only 5/8-inch material they are very easy to cut. You can see here that I drilled the holes while the stock was still 'square' and this is the preferred method. Also note that I've labeled the 'top' sides of the parts. This is because most hot-rolled stock has a better finish on one side than the other. If at all possible do not under any circumstances use hot-rolled as it is pure crap. I only used it on these trees because I had it on hand already.
I add chamfers to the edges of the parts with the 'roller' part of the belt sander and then smooth them flat with a regular palm sander. Here's the perch about half way thru being shaped and finalized. I still haven't sanded the top or bottom surface yet.
Here's the parts being put together. I generally do the final polishing after assembly so I can smooth down the welds a little bit.
Here are the rough forks on the bike in trial fit. These are not what I would consider to be 'riders' as far as looks go as I didn't spend a lot of time on the pieces since they were needed for a mockup on a tall frame so they are basically a shop tool that I'll be using on some other projects.
From start to finish this was about a 14 hour project but for a nicely finished set of forks it should have taken about 20 to 24 hours.
This method will work relatively easily on steel up to 1-inch thick and then you will begin to notice some kerf to the cuts as the saw blade deflects too much. The secret is not to use pressure, that way the blade stays straight, make many short cuts, not long ones, and let the saw do the work. Don't hurry. Pay attention to the details. This is not at all hard to do and I've actually done it with a handsaw back before I could afford a power saw.
Of course the ultimate way to build these is with a good band saw or a milling machine but it can be done with hand tools if you have the desire. That's the key to almost anything. How much desire you have to create something, not how much money you have.
